How to Choose a Phone Display: A Practical Buyer Checklist
A peak brightness number wastes the shortlist when it is an HDR or outdoor category. Choose a phone display by readable text, that category, and the refresh mode you will keep.
Misreading a peak brightness figure wastes the purchase when that figure is an HDR window or a short outdoor peak. Choose a phone display by readable text in your usual light, then by the refresh mode you will keep and the repair record on the panel in your hand.
Choose a phone display for the text you read, the light you stand in, and the motion you will keep, and leave every brightness number in its own category. Apple’s iPhone 15 Pro specification, fetched 17 October 2026, shows the split: 1,000 nits typical maximum, 1,600 nits HDR peak, 2,000 nits outdoor peak, 2556 by 1179 pixels at 460 ppi, and adaptive refresh up to 120 Hz. Use that sheet as a worked label, then repeat the same fields on the candidate in your hand. Set your text size before you judge how much fits. Note auto-brightness, True Tone or Night Shift, and the refresh mode. Try a message, a full-screen map in your brightest usual light, and a dim-room page. Width with the case on, plus the repair record for the panel in your hand, completes the choice.
On a narrow screen, swipe the table sideways to see the last column.
Scroll horizontally to see all columns.
| Input or item | Typical value or source | Why it matters |
|---|---|---|
| Typical maximum brightness | 1,000 nits, Apple iPhone 15 Pro specifications | The typical category, separate from either peak |
| HDR peak brightness | 1,600 nits, same page | An HDR peak, not the typical maximum |
| Outdoor peak brightness | 2,000 nits, same page | A separate outdoor category |
| Pixel grid and density | 2556 by 1179 pixels at 460 ppi, same page | Density belongs with the diagonal used to calculate it |
| Rectangular diagonal | 6.12 inches; the other published line is 6.1 inches; viewable area is smaller | Rounded corners sit inside that rectangle |
| Refresh ceiling | Adaptive rates up to 120 Hz (ProMotion), same page | A ceiling, not the frame rate of every app |
| Warm device | Maximum brightness is reduced until the device cools (Apple brightness guide) | A hot phone will not hold the catalog maximum |
| Android text unit | sp follows the text size you set; px = dp × (dpi / 160) | Judge the layout after the text size is the one you will keep |
Separate typical, HDR, and outdoor brightness
The number on the box answers a question only after you copy its category. On the iPhone 15 Pro specifications page, Apple prints three display brightness figures for one phone: 1,000 nits maximum brightness (typical), 1,600 nits peak brightness (HDR), and 2,000 nits peak brightness (outdoor). Those are three published categories. A comparison that drops the words in parentheses is comparing different jobs.
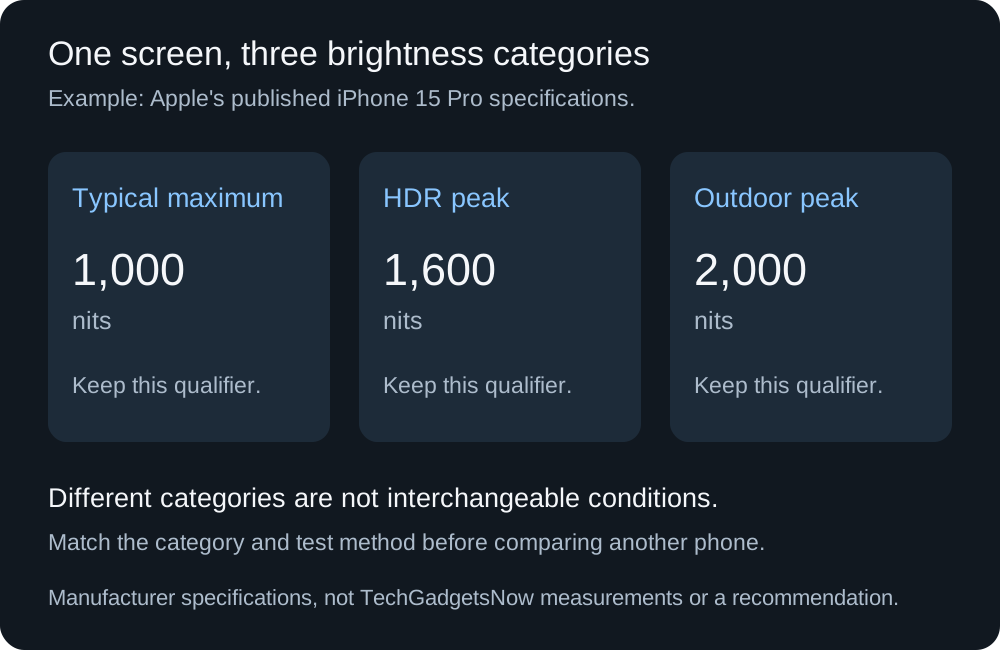
Keep the qualifier in the same note as the number. Apple’s iPhone 15 Pro page, fetched 17 October 2026, is the source of these three categories.
Rule of thumb. If a brightness figure exceeds 1000 nits, write the category in the same cell before you compare it with another phone. On this Apple page the figure above 1,000 nits is either the HDR peak or the outdoor peak, and the typical maximum stays at 1,000 nits.
Apple’s brightness guide adds a physical limit that the spec line does not repeat. If the device gets too warm, maximum screen brightness is reduced until the device cools. A shop demo that has been awake under lights can be in that reduced state. Let auto-brightness run if that is how you will use the phone. The same guide says iOS devices use an ambient-light sensor that lowers brightness in dark places and raises it in bright places, and that auto-brightness is on by default. True Tone, also on by default on supported phones, adjusts color and intensity to the ambient light. Night Shift moves the color toward the warmer end of the spectrum. Write those three settings down. Two phones can look different because one of them has True Tone or Night Shift on.
NIST defines luminous intensity in candelas and describes luminance as candela per square meter. Apple’s phone page reports these display figures in nits. Keep the nit value in the category Apple printed.
Takeaway: Copy typical, HDR, or outdoor next to the nit value, and note whether the phone was warm.
Match the failure to the check you can run
Each buying priority fails in a different place. The prevention is a record you can repeat on the next candidate.
Scroll horizontally to see all columns.
| Your priority | Dominant failure mode | Prevention |
|---|---|---|
| Messages and articles | Text that is comfortable in the shop and cramped after you set your real size | Set that text size, then read a thread and open a settings page |
| Maps in your brightest usual light | An HDR or outdoor peak treated as sustained full-screen brightness | Trial a full map with auto-brightness on; expect a lower maximum while the phone is warm |
| Games and fast scrolling | A home-screen animation judged as the app’s frame rate | Scroll the app in the refresh mode and power mode you will keep |
| Years of ownership | A faint remnant from a static, high-contrast image held at high brightness, or a replaced panel the launch spec does not name | Inspect light and dark pages on the glass; keep any replacement paperwork |
Takeaway: Pair each priority with the failure you can see, and leave the cell blank when that check has not been run.
Check width and text before you trust the diagonal
A diagonal names a size class. Grip comes from body width, weight, and the case. Apple’s iPhone 15 Pro page says the display is a 6.1-inch (diagonal) all-screen OLED, and then says that measured as a standard rectangle the screen is 6.12 inches diagonally, with the actual viewable area less than that because the corners are rounded. Hold the phone the way you will hold it with the case you plan to use. Reach the controls you use. If the stretch is awkward, the diagonal has already done its job by getting you into the wrong size class.
Android’s density guide is the reason a pixel count is not a comfort measurement. The same physical size can carry a different number of pixels. Android’s conversion is:
px = dp × (dpi / 160)
One dp is about one pixel on a 160 dpi baseline screen. The guide’s worked distance is a gesture threshold of 16 pixels. At 160 dpi that distance is 1/10 inch (2.5 mm). At 240 dpi it is 1/15 inch (1.7 mm). The pixel count did not change. The physical distance did. For text, Android says to use sp, which tracks the text size you choose, and not to use sp for layout sizes. Set the text size you will keep, then look at a message thread, an article, and a settings page. Buttons move when text grows. A large panel full of tiny type is a worse reading display than a smaller panel at your size.
Worked example. Apple prints 2556 by 1179 pixels at 460 ppi and a rectangular diagonal of 6.12 inches. Square the sides, add them, and take the square root: 2556 squared is 6,533,136, 1179 squared is 1,390,041, and the sum is 7,923,177. The square root is 2,814.8 pixels along that rectangle. Then:
ppi = 2814.8 / 6.12
That division is 459.9 ppi, which rounds to the 460 ppi on the same page. Repeat it for another phone only when that phone’s page prints both the pixel counts and the rectangular diagonal you are dividing by. The 6.1-inch line is a different published figure. Using it in the denominator does not reproduce the 460 ppi.
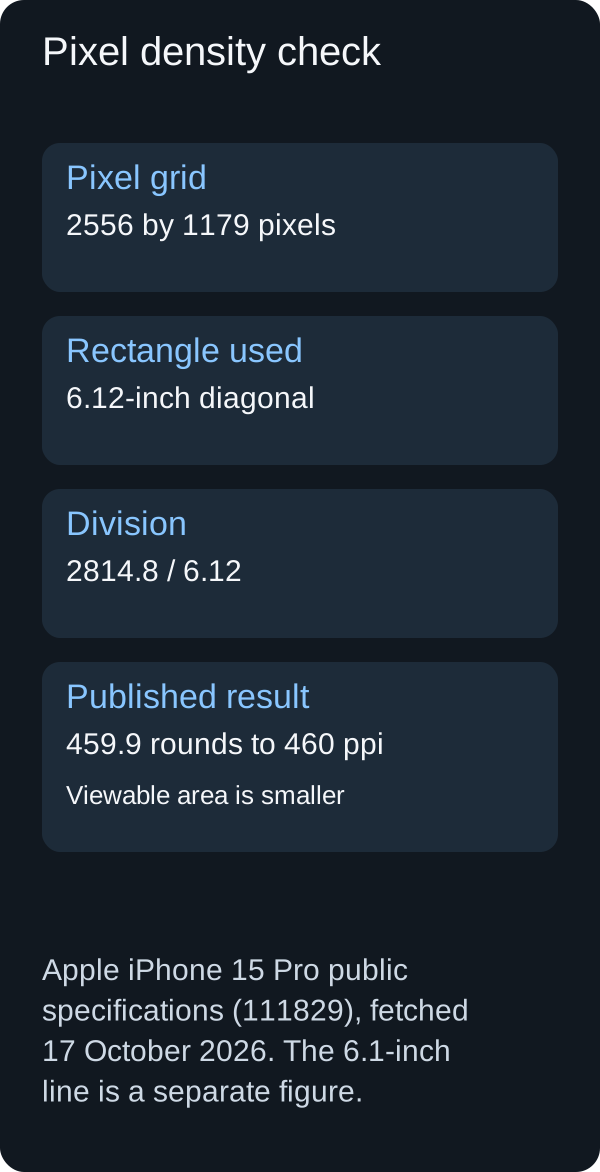
The arithmetic uses Apple’s published pixel counts and the 6.12-inch rectangular diagonal. Rounded corners make the viewable area smaller than that rectangle.
Takeaway: Divide by the diagonal printed with the density claim, after the text size is set.
Judge refresh in the app and in the power mode
A refresh ceiling is the fastest the panel is allowed to update, not the frame rate of the thing on screen. Apple’s iPhone 15 Pro line is “ProMotion technology with adaptive refresh rates up to 120Hz.” Adaptive means the rate moves. Up to 120 Hz means 120 Hz is the top of the range on that page.
Android’s multiple-refresh-rate notes describe how the platform picks a rate from the layers that are drawing. If one layer sets 24 frames per second and another sets 60, SurfaceFlinger will pick 120 Hz when 120 Hz is available, because 120 is a multiple of both. The panel can be at 120 Hz while neither layer is producing 120 new pictures a second. Scroll the feed, the browser page, or the game you care about. A smooth launcher animation does not establish the game’s rate. Write down the display mode. A battery-saving mode on one phone and a performance mode on the other will make a panel comparison meaningless.
Rule of thumb. If low power mode caps refresh under 60 Hz, judge motion in that mode before you pay for a higher ceiling. Android’s display policy restricts the refresh rate to 60 Hz or lower while low power mode is on (Settings.Global.LOW_POWER_MODE). That sentence is Android’s platform rule for low power mode. Apple’s battery page describes Low Power Mode as reducing or disabling some features, including some visual effects, and prints no refresh number there. Read the phone’s own documentation for the mode you will leave on.
High screen brightness consumes a lot of energy. Apple’s battery page says so directly, and it tells you to turn auto-brightness on when it is off, or to dim the screen. A panel you can read only at the top of the slider spends that energy on every bright trip. Leave any percent saving out of the note. Put brightness, refresh mode, and the activity into the same record, then use the phone battery-life comparison to see which hour was tested under which setup. The display choice and the runtime claim are one record.
Takeaway: Record the app, the refresh setting, and the power mode together.
Walk the same three lights and keep the settings
A short shop demo can show a mismatch. It cannot prove long-term comfort. Use three ordinary settings during a trial you are allowed to make: indoor reading, a brighter window, and a dimmer room. Stay with the demo unit unless the seller has allowed you to step outside.
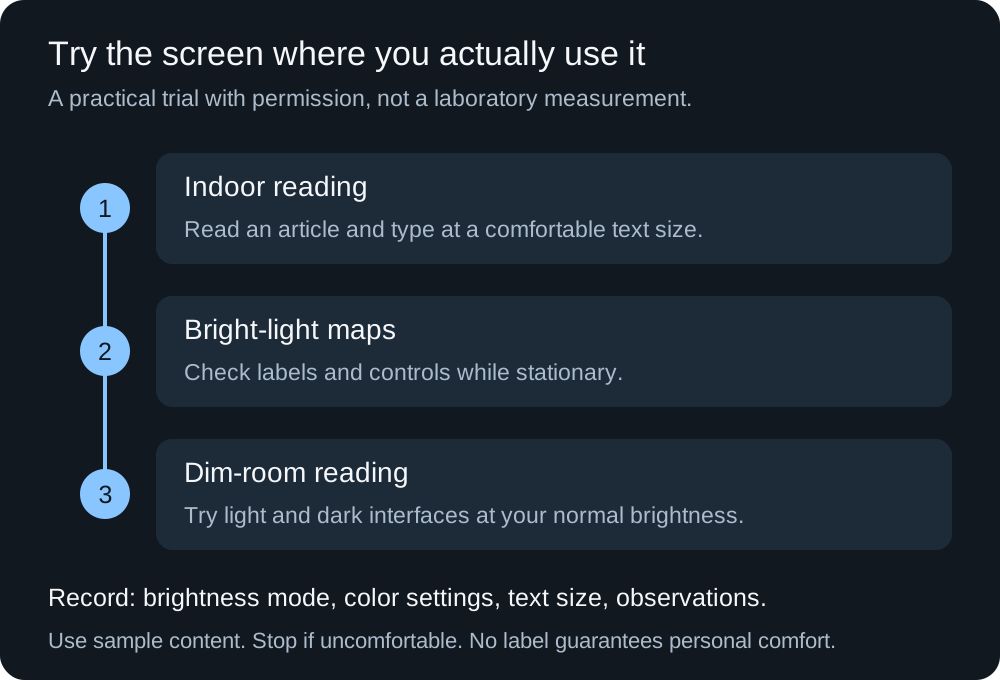
Same tasks, three lights. The note is the settings, so you can repeat the comparison.
Indoors, read a few paragraphs and type a disposable message at your text size. Near a bright window, look at a map and the camera controls while you stay put. In a dim room, use the brightness you would keep at home and open both a light page and a dark page. Stop if the panel is uncomfortable. Apple’s OLED note says that at reduced brightness, against black, scrolling can show a slight blur or color change, and that off-angle viewing can shift color and hue. That page calls both normal OLED behavior. If the shift is uncomfortable in the dim trial, reject the panel.
Use sample content on a demonstration unit. Write whether auto-brightness, True Tone, Night Shift, or a vivid color mode was on.
Takeaway: Repeat the same tasks and record the display settings in each light.
Treat persistence, glass, and paperwork as the ownership failure
OLED, on Apple’s Super Retina page (published 1 June 2026), emits light from each pixel and has no separate backlight. That page also separates two aging effects. Image persistence is a faint remnant that disappears after a few minutes of normal use. Burn-in is the more extreme case: the same high-contrast image, continuously, at high brightness, for a prolonged period. Apple says its Super Retina and Super Retina XDR displays use per-pixel usage data to adjust pixel brightness and reduce those effects. The care steps on that page are for those iPhone displays: install the latest iOS, leave auto-brightness on, use a shorter auto-lock, and avoid static images at maximum brightness for long periods. For a different brand, read that maker’s care page. The failure mode to look for is the same kind of remnant, not a guarantee that every phone runs Apple’s algorithm.
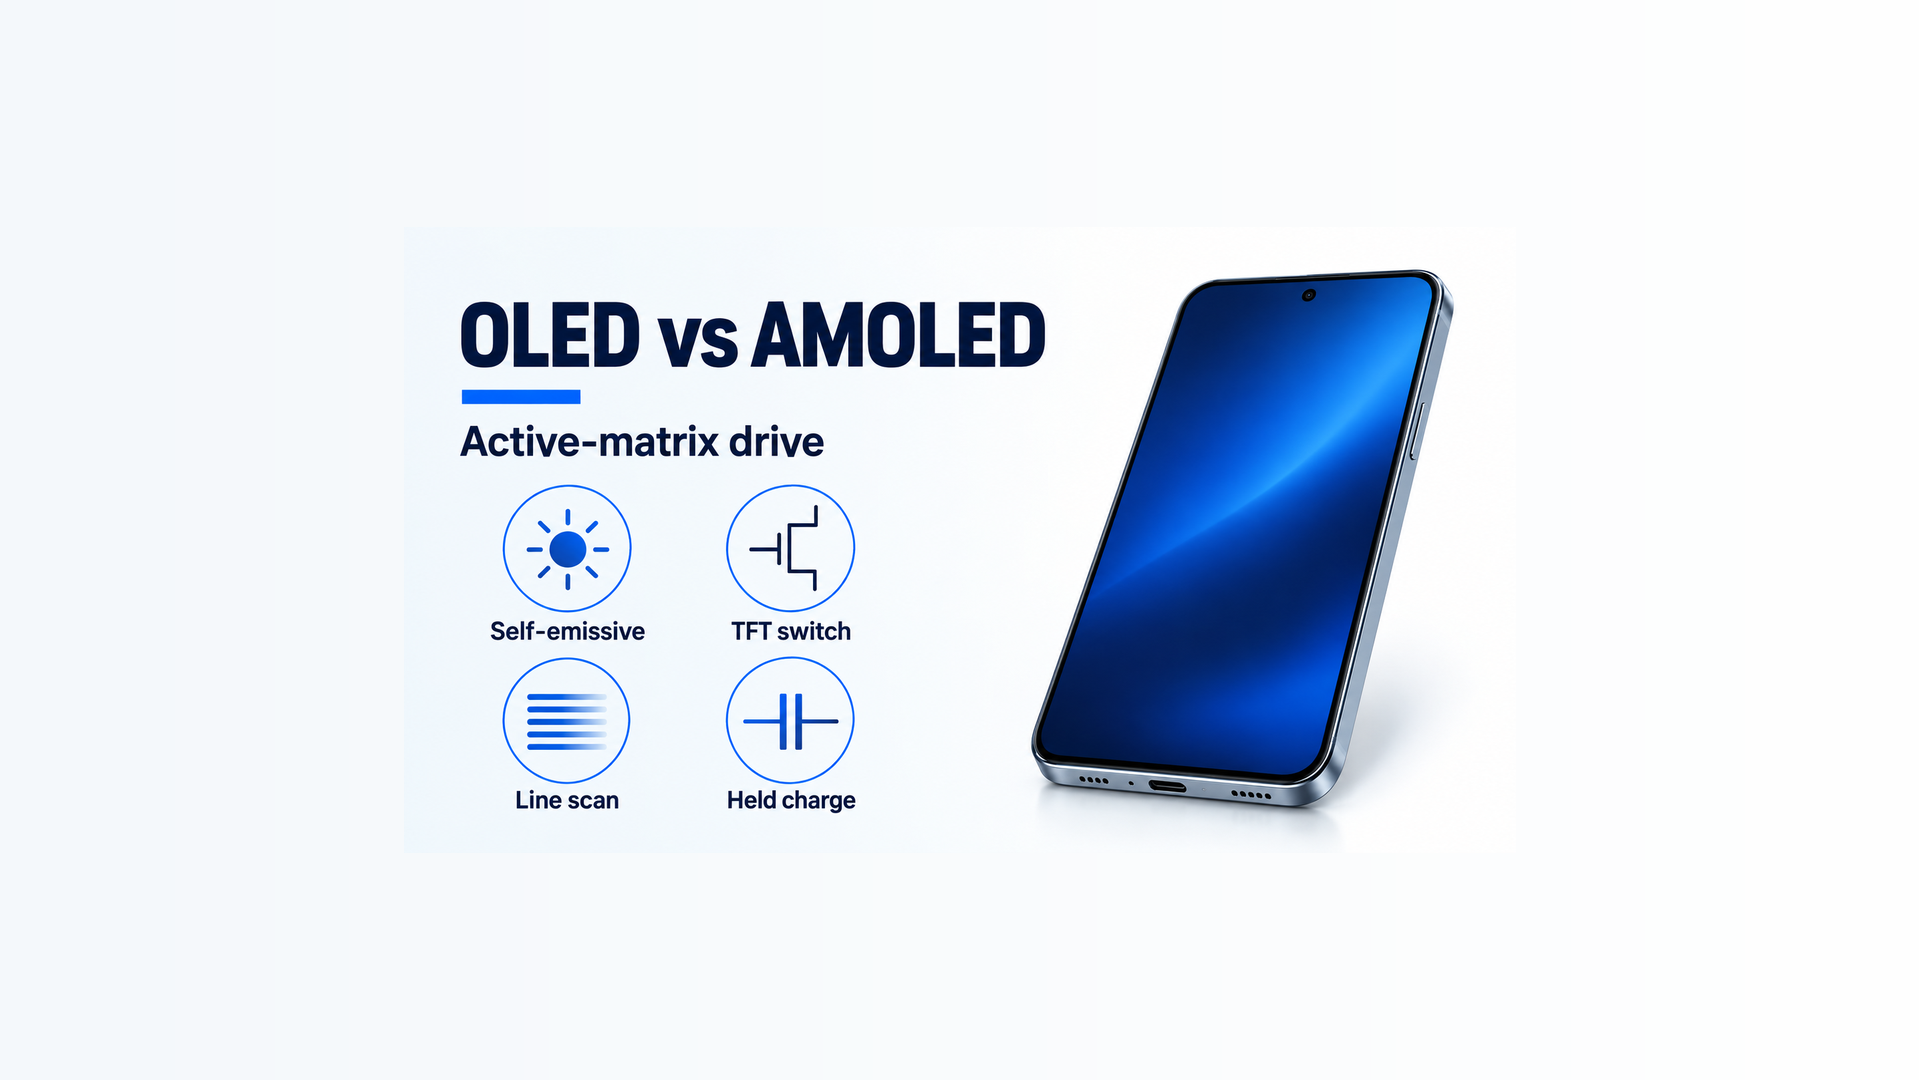
OLED and AMOLED labels name the family and, for AMOLED, the active-matrix drive. Brightness, comfort, and adaptive refresh come from the panel you try. An LCD phone can still be the readable one in your light.
The hidden cost of a display that only works at sustained high brightness is energy, as Apple’s battery guidance states, plus a higher chance of the static-image case Apple describes. The hidden cost of a used panel is a replacement the launch specification does not name. View ordinary light and dark content on the glass. A screenshot viewed on another device shows the software image. The condition of this panel is what you see on the glass. Ask what was replaced and keep the paperwork. Try touch across the keyboard. Leave drop and scratch claims to the maker’s protection statement. A protector is part of what you look through: check the maker’s compatibility note, then look at reflections, edge gestures, and fingerprint unlock with the protector type you will use.
All displays, OLED and LCD, can lose brightness as they age. Apple says that on the same OLED page. A dim panel and a worn cell are different parts. If the phone is one you already own and the complaint is runtime, the battery replacement guide separates a worn cell from a screen a new cell will not fix.
A sharper grid leaves memory and the software-support window blank. After the screen trial, use the RAM guide for the apps you keep open and the software-support guide for the years you intend to keep auto-brightness and adaptive refresh.
Takeaway: Inspect the glass you are buying, and file the replacement record next to the launch spec.
Close the checklist before you pay
Write the decision as a task you completed: the text fits, the map is readable in your brightest usual place, and the motion is acceptable in the mode you will leave on. Add the limitation in the same line, such as a width that is already awkward with the case, or a color shift at low brightness that you are willing to keep.
File that row with the rest of the phone on the smartphone buying guides. The display line is one field in that record. Support, memory, and the unresolved trade-off sit beside it.
Before paying, confirm:
- Width, case, and your real text size are comfortable for the grip and the typing you do.
- The brightest place you use the phone still shows a map and the camera controls, with the brightness category written beside any nit figure.
- Motion is acceptable in the app and the power mode you will keep.
- Low-brightness comfort, including any OLED color shift the maker describes as normal, is acceptable to you.
- Protector, touch, visible remnants, repair paperwork, and the return deadline are filled in. An empty cell stays empty.
Scroll horizontally to see all columns.
| Acceptance field | Settings, evidence, and result |
|---|---|
| Model and any screen-replacement record | ________ |
| Width, case, and text size | ________ |
| Brightness category, source, light, auto mode, warm or cool | ________ |
| Refresh setting, app, power mode, and what you saw | ________ |
| Protector, touch, remnants, repair terms | ________ |
| Accepted, unresolved, or return deadline | ________ |
Takeaway: Leave an untested condition visible, and read the return terms before you pay.
Sources
Fetched 17 October 2026 unless a page prints its own date. Brightness, resolution, diagonal, and refresh figures for the worked example are Apple’s iPhone 15 Pro categories, not a cross-brand rank. The three-light route and the acceptance table are purchase checks.
- Apple Support: iPhone 15 Pro specifications
- Apple Support: adjust brightness and color temperature
- Apple Support: Super Retina and Super Retina XDR displays, published 1 June 2026
- Apple Support: if the battery drains too quickly
- Android Developers: support different pixel densities
- Android Open Source Project: multiple refresh rate
- NIST: SI unit of luminous intensity, the candela
Related articles
OLED vs AMOLED: What the Labels Mean on a Phone Spec Sheet
Paying for the letters AM wastes a drive-method word. AMOLED means active-matrix OLED, and the suffix leaves brightness and refresh unset.
Read article
Using USB-C Headphones on Android: Digital Audio & DAC Checks
USB-C headphones stay silent when the adapter is analog-only. Use the AOSP digital-to-analog rules, then log playback, the microphone, buttons, and a blank call cell.
Read article
Is It Worth Replacing a Battery in a Cell Phone?
A worn battery can waste a cell phone that still works. Match the health screen, the software-support window, and the other hardware before you replace the phone.
Read article